I'm Chad Lindley, a product manager with Dell Software. And today I'm going to demonstrate how to quickly migrate from Google to Office 365 using On Demand Migration for Email. Let's start by looking at our source mailbox. And I wanted to highlight one of the messages in here.
This one has a large attachment. It's 6.8 megabytes. And we're going to use this to demonstrate one of the unique features within On Demand Migration for Email for handling large attachments as part of the migration process.
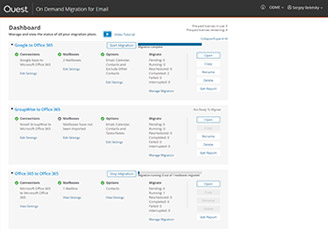
As you log into the portal, you'll see that there's a variety of plans here. These have all been previously created. When you first login, you'll create a new plan. The one we're going to use for our migration today is called Google to Office 365.
So let's take a look at the settings. So the first step is to set up your connections. So we create a source connection into Google Apps, we give it authorization to be able to extract the data. We create a target connection, as well, into Office 365 and use an admin account to insert data into there.
For this migration today, we're just going to use one admin account. But you can add admin accounts if you want to do more than 10. So each admin account can migrate 10 mailboxes simultaneously. You can add more if you want to do a higher velocity migration.
Within each of these connections, you can also test the connection. So if we wanted to make sure we have connection into the source and we have access to the mailboxes, we can just type in one of the users we're going to migrate and let it connect into the source. And once it's done that, it will validate that it has the access it needs.
And it will come back with a green check mark if we're ready to go. And that's completed. And so you can see that we have the access that we need and we can proceed with the migration.
The next step in the process is to specify the mailboxes you want to include in this specific migration. You can see you can add mailboxes individually, or you can import a TSV. I've got two mailboxes here set up that we're going to migrate. So we're going to be taking care of Beth Jones and David Morris with this migration. So we can continue.
The third step in our four step process is to set up the specific options that we want for this migration. You'll notice that On Demand Migration for Email does give you the ability to automatically manage the extraction throttling. So within Google you're only allowed to extract a certain amount during a 24-hour period. And we want to make sure we don't exceed that and impact the user's ability to use their email.
So we automatically do this. You can set it to whatever you'd like, but this 2,200 megabytes is typically good for most migrations. We can select what we want to migrate. For the email, we need to be able to convert labels. So this is something that's a little bit different concept between Google and Office 365. Google has a concept of labels.
You can either convert those into folders or you can convert them into categories. And we have some exclusions if you want to get particular about how these are done. They have some very specific settings you can use. You can do filtering, if you want, based on date range. You can exclude certain folders. If you want, include the contacts and calendar.
We also have the ability to automate forwarding. So you can set up routing to make sure that mail delivers to the appropriate mailbox based on where you are in your migration. So those are the source settings.
On the target side, we also have the ability to move large attachments to OneDrive for business. This was primarily implemented because office 365 has limits on the size of the attachments that you can have. But it's also just a good way to move some of the data out of your mail system and into more proper storage for large attachments.
So give it some information about how to login to OneDrive for business and the size that we want. And you'll notice the attachment were looking at earlier had 6.8 megabytes. So I'm setting this at 5 for this migration, so that we can catch that attachment as an example.
You may have this is a higher limit for your normal migrations, maybe 20 or 25 megabytes, something that's appropriate for your environment. We also can include some text that will explain to the user that this was moved off. And you'll see that as we do this migration.
So as the third step's completely, we can do Save and Continue again. And when we're ready to proceed with our migration, just click the Start Migration button. You see On Demand Migration for Email is running both of them. It's estimate of the items, and it's even started processing a few already.
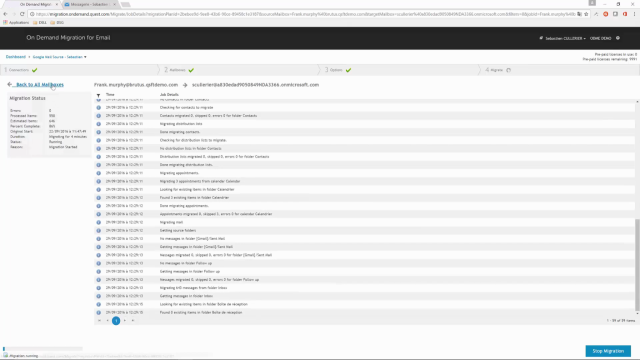
You can see the status of each of the mailboxes individually. And if you wanted to grab the details, you can also go into the View Logs and you can get into the log file for each of the migrations it's running, look into the details of what's happening. So as this migration finishes up, let's take a look at the target mailbox.
So I'm going to login as David Morris, who is the same user that we looked at the source mailbox earlier. You can see all the messages are here. That sample plan we looked at earlier, you'll notice that we have some information messages here. There's an attachment about what was skipped.
But you'll also notice that there's what looks like the same message that they can look at. And this attachment actually shows them the text
 05:52
05:52


